
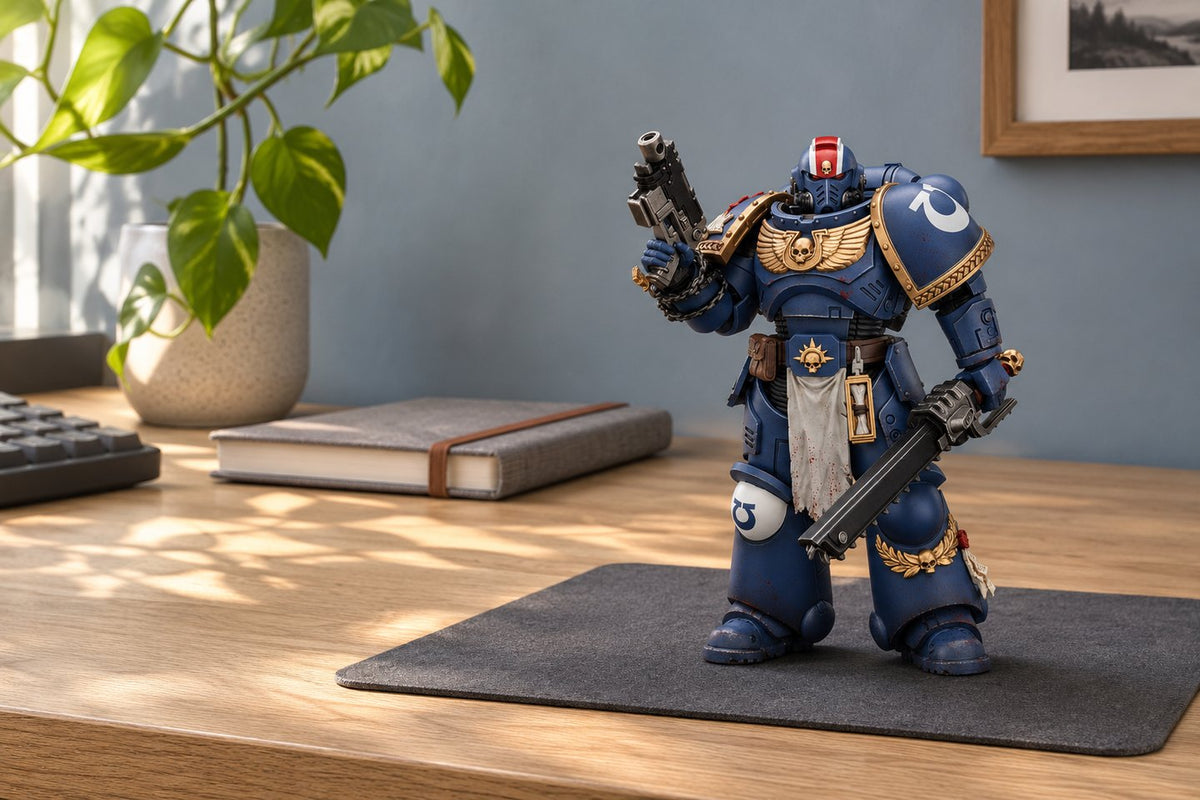
Put a mug on the shelf where you want to display Lieutenant Titus. Take two steps back, then sit in the chair you normally use in that room. Can you see the whole mug? Can you lift it out without hitting the shelf above? Those two questions reveal different things about the same space. A figure can fit a cubby beautifully on paper and spend its life with its face hidden behind a shelf lip. The mug is a quick way of finding out which problem you need to solve first.
A first display asks for a few measurements that furniture listings rarely give. You need space for the figure in the pose you like, space around that pose so you can see it, and space for your hands when you put it away. A piece of scrap paper, a ruler and a cardboard cereal box are enough to work all three out. You can do most of the planning before opening a collectible.
What the scale label tells you
The JOYTOY Lieutenant Titus product page identifies the figure as a 1:18 collectible. Scale is a useful starting point when comparing figures from the same line. The space a particular piece takes up also depends on its sculpt, equipment and how you arrange it. A shoulder piece can extend past a foot. A hand can sit forward of a base. Turn the same pose through a quarter turn and the apparent width and depth exchange roles. A single height measurement leaves those decisions open.
Decide which version of the figure you want to look at each day. For example, you might like Titus square to the room with both shoulders visible. Alternatively you might want him turned towards the door with the line of one arm leading into open space. Save the product image closest to your choice. Treat it as a guide to silhouette. Perspective, cropping and the absence of a ruler make a product picture a poor source of exact dimensions.
If the figure is already in your hands, place it on a clear table in your intended pose before measuring. Leave room to support the torso as you adjust it, and use the instructions supplied with your particular edition. Once it stands as intended, put slips of paper just outside the leftmost, rightmost, frontmost and rearmost points. Measure between the slips after lifting the figure clear. You now have the footprint of the displayed arrangement, including accessories that project beyond the feet.
Make a map of the usable surface
Measure the clear width along the front of the shelf and then again at the back. Side trim, uneven walls and supports can make those numbers surprisingly different. Write both on a sheet of paper. Do the same for depth at each end, stopping at any lip or mounting hardware. If there is a cabinet door, close it gently on an empty shelf first and note where the inside face sits. A measurement to the outside of the door buys you space you cannot use.
Measure vertical clearance from the top of the display surface to the lowest obstruction overhead. Look for fittings tucked beneath the shelf above. A light strip or the head of a support screw can take up precisely the spot where you planned to put a tall detail. Mark the obstruction as a small shaded area on the map. You can often keep a pose by moving its highest point a little to the side of that patch.
A piece of plain wrapping paper works well for a life-size plan. Lay it on a table and draw the surface you just measured. Mark the front edge and the direction of the room's main viewing position. Add the spots you want available for other uses, such as a cable at the back or a book that will stay beside the figure. A real object earns its place on the drawing even if it will never appear in a carefully cropped photograph.
A ruler at the back of a shelf can be awkward to read with your head inside the compartment. For that measurement, slide a narrow strip of plain paper to the back wall and crease it where it reaches the usable front edge. Lay it flat on the table and measure between the end and the crease. Repeat near the opposite side. The two strips also give you physical depth gauges you can hold next to a potential riser. Date them and label each one with its side. A folded paper gauge makes a particularly handy companion when you are comparing display supports away from home.

Make a stand-in you can handle
Cut a rectangle of card to represent the footprint of the pose. Fold a second piece upright to approximate its height. You can slot the two pieces together or tape them to each other. If you have no dimensions yet, build two or three deliberately different stand-ins and label them small, medium and large. Write down the measurements you chose. These are trials of the shelf, and the labels keep anyone from mistaking a guess for the dimensions of the actual Titus figure.
Draw a simple face on the front of the upright card. Add a projecting paper tab on the side where you expect a hand or accessory to extend. That crude tab does a job a rectangular box cannot. It shows what happens if something sticks out over a clear area even though the feet fit comfortably. A second tab at the back can stand in for a backpack. Make the tabs easy to fold in and out so you can compare two orientations.
Put the mock-up on the shelf and walk away from it. Approach the room from the usual entrance with something in one hand. Look first at the card without moving it. Which side can you see, and does the drawn face sit in shadow? A setup that looks flat while you stand immediately in front of the cubby may have a lovely profile from the doorway. Decide which view you want to favor before spending time moving the display by millimeters.
Work a sample layout on paper
Suppose your usable shelf is 48 centimeters wide and 24 centimeters deep, and a trial pose occupies a rectangle 12 centimeters wide by 11 deep. These are round numbers for a paper exercise. Substituting your own measurements will produce a plan for your room. Centering that rectangle left to right leaves 18 centimeters on each side. Centering it front to back leaves 6.5 centimeters behind and in front. You can draw that arrangement once and immediately see which empty spaces mean something to you.
Now place the center of the trial rectangle 19 centimeters from the left edge. The rectangle spans from 13 to 25 centimeters across the shelf, leaving 23 centimeters on its right. Put the front edge of the rectangle 5 centimeters back from the front edge of the shelf. Its rear edge sits at 16 centimeters, leaving 8 centimeters to the back. You have traded perfect symmetry for an open area toward which the figure can face and a little working room behind it.
Use one more strip of card to test a companion with an imagined footprint of 10 centimeters. Set it in the space to the right and leave a visible gap between the two shapes. The plan will tell you whether two footprints fit. The upright models will tell you whether the heads appear separated from the entrance. Record the distance between the front corners of the cards in the arrangement you prefer. This gives you an easy way to find it again without drawing a permanent mark on the shelf.
Choose the height from the room
People frequently describe eye level as if a room had only one. Sit where you watch television, stand at the doorway and crouch beside the seat where a guest might see the shelf. At each position check whether you can see the drawn face and the space immediately above it. A shelf beside a standing desk has different demands from one above a low sofa. Pick one primary viewing position and one secondary position. Two clear priorities make the remaining choices easier.
When a shelf is high, the front lip can visually cover the feet. Try moving the mock-up backwards and forwards while watching from the seated position. The change can be more striking than raising the figure. If you do try a riser, put an empty, stable trial block under the cardboard version first. Recheck the overhead clearance and how you will lift the actual figure out. Raising the feet changes the working space above every other part of the piece.
On a low shelf, the top of the figure can dominate the view. A slight turn towards the entrance may give the face a more readable outline. Test the whole figure on its support as a unit. Tilting a torso or turning a head to compensate for an unfortunate shelf position can create balance and handling problems. If the card looks better one shelf higher, compare those two locations before committing the actual figure to either.
Give your hand a route in and out
Imagine replacing Titus after a shelf clean. Your fingers will need a place to approach the torso, and your other hand may need to steady the support. Rehearse the move with the cardboard version. Notice where your knuckles go and whether your wrist must turn at the last moment. An arrangement that takes a delicate sideways twist on a completely empty shelf becomes less pleasant to use when a second figure arrives. Leave yourself a straight route if the furniture permits it.
A projecting detail can clear an opening while the display is stationary and catch the frame during removal. Move the mock-up out along its actual path. Watch the corner of each paper tab as it crosses the edge of the shelf above. If a tab brushes the frame, move it inward on the mock-up or rotate the whole layout and try again. This little rehearsal gives a fragile accessory a better chance of staying with the figure when you finally use the shelf.
Detail what needs to move for access. If you must remove a book, a label and a second figure to pick up the first, there is a simpler arrangement waiting to be found. A label can sit to one side. A companion can stand on a separate support. Keeping the path clear may take only a small change to the floor plan. You will appreciate it the first time you want to inspect the sculpt in better light.
View the animated detail
Use the light you already have
Look at the empty shelf at the time of day you usually enjoy your collection. A ceiling light directly above a deep shelf can leave the face in shadow while lighting the tops of both shoulders beautifully. Hold a piece of white paper beside the trial figure and move it towards the front opening. Watch for a patch where the paper receives light from the room. Move the mock-up into that patch and look again from your regular viewing position.
The back of a bookcase often has a stronger color than you remember. Blue packaging immediately behind Titus can absorb the outside line of the armor into a larger blue patch. Slip an ordinary sheet of neutral paper against the back as a temporary comparison. Try a darker sheet as well as a lighter one. Choose the version that lets you distinguish the face, shoulders and legs at a glance from across the room.
A photograph helps when two arrangements seem equally good. Take one frame for each while standing on the same floorboard and holding the phone at the same height. Keep the shelf edges in the picture. Compare them side by side at a small size. A pose that survives as a thumbnail will probably read well from the other side of the room. Keep the picture of your favorite with the measurements instead of relying on memory.
Put the actual figure in place
Clear the entire route between the unpacking table and the shelf. Keep the packaging and loose items on the table until the figure is standing securely. Start with the support or base you actually intend to use. Measure its outer edges and update the mock-up if necessary. If the real footprint differs from your estimate, the drawing has done its job. You can make the change on paper before bringing a second collectible anywhere near the shelf.
Set Titus down with the simplest stable pose that shows the side you chose. Check the support and the feet from each accessible angle. If an accessory changes the balance, remove the figure to the table and work there. It is easier to spot a loose item against a plain tabletop than between the rear edge of a cabinet and the wall. Add surrounding objects only once you are happy with the figure's own position.
Look again from your two primary viewpoints. The actual head sculpt and weathering may draw your eye differently from the plain card. Allow one adjustment at a time. Turn the figure slightly, compare it to the photo of the mock-up, and then decide whether it needs moving. If you change the pose, background and height in the same pass, you lose the chance to learn which made the difference.
Reserve a useful space for a future figure
If you plan to add a second piece, give the empty space a specific job now. A gap can give Titus room to look into, provide a path for your hand, or become the spot for another figure. One gap can do two of those jobs at different times, but it cannot do all three once the shelf fills up. Mark an empty rectangle on the paper plan and decide what will change if it becomes occupied.
A future squadmate such as Brother Chairon in the JOYTOY collection is a good reason to try a second mock-up. Use the companion's own reference photographs when deciding its orientation. Similar scale and armor color do not guarantee that both figures look good facing in the same direction. Set the second paper face a little farther back, then level with Titus, and observe where their outside contours meet from your main viewing position.
You can postpone a second purchase and still finish the first display. A deliberately off-center figure with a clean patch beside it can feel complete. Put a small flat paper name card there for a week if the space seems bare. If the name card competes with the face, move it nearer the figure or remove it. Empty space is valuable when it helps you see something clearly or reach it easily.
Put a small record behind the plan
Write a short location note on the back of the drawing. Include the shelf, its clear width and depth, the pose orientation, the support used and the view you cared about most. Add the date and the name of the photo you saved. Four or five lines are enough to distinguish this arrangement from the one you try next winter. Keeping the note with the packaging inventory also helps if the collection moves to a new room.
In a shared space, add one sentence that helps someone else handle the arrangement. It could say that the figure comes out towards the left or that a particular tray holds the loose accessories. This is especially helpful if someone dusts the room while you are away. Store that practical note where it can be found easily. A diagram tucked under the figure itself is difficult to consult when the figure is the thing you need to move.
After a few days, notice what you actually see first when you enter the room. If the face disappears behind a reflection every evening, test a sideways move with the paper plan. If you enjoy the profile more than the front, rotate the support and take a fresh picture. The figures you add later will benefit from the work you put into this first one, because you now know what those shelf measurements look like from the chair, the doorway and your own two hands.
A final test with the furniture in use
A first shelf shares a room with activities the drawing never shows. Open the nearest drawer to its usual stopping point. Take the book you use most often from the neighboring compartment. Sit down and stand up from the chair beside the display. Watch the paper mock-up while these things happen, especially if the shelf belongs to a freestanding piece of furniture. An item that shifts during ordinary use deserves a different location before a collectible goes there. Follow the furniture maker's installation and load instructions for the shelf itself.
If the shelf has a door, make one last test with the door shut and the room light on. A reflected window may fall across the face only when the door reaches its final position. To work out how far to move the display, hold a small piece of paper outside the glass at the reflected spot, then look at where the figure sits behind it from your primary chair. Move the mock-up to one side of that patch and close the door again. This gives you a concrete alternative to repeatedly turning the figure and hoping the reflection will disappear.
Finally, ask someone who did not make the plan to point out the face from the doorway and say which detail they notice next. Their answer gives you information about the shelf, even if they know nothing about the character. Perhaps they spot a shoulder emblem you overlooked, or their eye goes straight to a bright label on the book behind him. Decide whether you like what they see. A successful first shelf is personal enough to give the owner a favorite view and simple enough that a visitor can find a reason to stop. Put the spare paper templates in the packaging folder. The next time you see a figure you love, you already have a way to picture it in this room.


Hinterlasse einen Kommentar
Diese Website ist durch hCaptcha geschützt und es gelten die allgemeinen Geschäftsbedingungen und Datenschutzbestimmungen von hCaptcha.